Belajar Bisnis Online Dari Jualan Propolis Dan Distro Online
Cara membuat Jam Cantik dan Berbunyi di Blog (blogspot) tanpa Banner
buka: Blogger Dashboard > Layout > Page Element > Add a Gadget > HTML/JavaScript
kemudian copy kode di bawah dan paste pada Gadget > HTML/JavaScript yang terbuka:
<embed pluginspage="http://www.macromedia.com/go/getflashplayer" src="https://sites.google.com/site/myedithtml/swf/edit-html.clock-7.swf" wmode="transparent" type="application/x-shockwave-flash" width="120" height="40">
Kemudian Simpan, dan lihatlah hasilnya.
*) warna merah adalah ukuran jam yang dapat anda sesuaikan.
Cara Membuat Highlight all (teks dalam Kotak)
Pada kesempatan ini saya ingin mempostingkan cara membuat Highlight all atau membuat kotak sebuah teks seperti pada gambar di atas. Highlight all ini sangat berguna bila kita ingin mempostingkan atau membuat tempat suatu teks ataupun script agar mudah untuk diambil/dicopy oleh pengunjung blog kita. Disamping itu highlight all ini juga mempermudah pengunjung dalam meng-copy teks ataupun script yang telah kita postingkan atau sediakan.
Contohnya seperti dibawah ini :
Setelah anda melihat contoh di atas dan berminat untuk mencoba dan memakainya silahkan ambil code dan ikuti langkah berikut ini.
Jika anda ingin memasangnya di sidebar ataupun di widget
1. Login dulu ke blogger anda
2. pilih RANCANGAN
3. kemudian pilih Add Gadget/Tambah Gadget => pilih yang HTML/Javascript.
4. Masukan kode di bawah ini ke dalam content HTML/Javascript:
<form name="copy">
<div align="center">
<input onclick="javascript:this.form.txt.focus();this.form.txt.select();" type="button" value="Highlight All" /> </div>
<div align="center">
</div>
<div align="center">
<textarea cols="55" name="txt" rows="100" style="height: 144px; width: 300px;" wrap="VIRTUAL">simpan tulisan anda di sini, maka tulisan yang anda tulis akan muncul di sini dan siap di copy oleh para pengunjung</textarea></div>
</form>
</div>
6. Kemudian Simpan.
7. Setelah itu view blog dan lihat hasilnya.
Akan tetapi jika anda ingin menampilkan kotak teks tersebut di postingan anda. Anda cukup meng Kopas Code diatas di pilihan EDIT HTML pada form posting.
Selamat Mencoba............ dan semoga Sukses... Amin.......
Google Update Pagerank
 Hari ini google update pagerank, kira-kira seperti itu yang saya lihat ketika beberapa blog saya mengalami perubahan angka pada pagerank. Seperti biasa google update pada saat yang tidak di duga-duga, dan memang belakangan google sudah tidak teratur dalam melakukan update pagerank. Ada suka ada duka, buat yang PR nya turun jangan kecewa, semoga di update berikut bisa naik lagi dan buat yang naik jangan terlalu besar hati, karena pagerank memang bukan satu-satunya tolak ukur kesuksesan sebuah blog/web, masih banyak tolak ukur untuk menilai kesuksesan sebuah blog.
Beberapa blog saya juga ada yang turun termasuk blog ini, namun ada juga yang bisa membuat saya senang karena www.mybloggerthemes.com akhirnya bisa naik kelas. Semoga sukses buat semua yang naik peringkat, dan buat yang turun jangan kecewa. Tetaplah menulis dengan gayamu dan jangan pernah melakukan copy paste, karena itu akan sangat buruk di mata google.
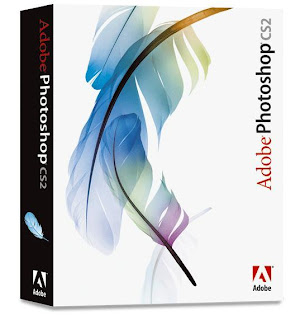
Adobe Photoshop CS2 + Keygen
 Adobe Photoshop adalah salah satu perangkat lunak/software yang banyak dipakai oleh beberapa orang untuk mengolah gambar/image, terutama para Editor photo. Adobe Photoshop juga sering digunakan oleh sebagian orang untuk men-desain, membuat animasi GIF, membuat tombol, membuat web desain dan banyak lagi manfaat dari Software ini.
 kalau menurut saya pribadi Adobe Photoshop adalah salah satu software pokok yang harus ada atau harus terisntall di komputer saya. Karena dengan adanya Adobe Photoshop saya bisa bekerja lebih lancar dan terdukung. oleh karena itu jika komputer saya tidak ada Adobe Photoshop ya seperti kata pepatah "bagaikan Sayur Tanpa Garam" hehe :D...
Kenapa begitu karena Software Adobe Photoshop juga termasuk software pendukung pekerjaan yang kerap dipakai oleh berbagai Profesi. Terutama yang saya tahu Adobe Photoshop ini digunakan oleh seorang Design Graphic, Seorang Animator, Seorang Editor Video, Kameramen, Seorang Web Designer dan terutama lagi saya .. :D hehee.
Karena Adobe Photoshop adalah salah satu Software yang sering saya gunakan, maka dari itu sofware ini ingin saya abadikan lewat Postingan ini .....hehehe :D. Meng-Abadikan bukan berarti disimpan rapat-rapat atau tidak boleh diambil/di download orang. Akan tetapi agar saya bisa lebih mudah mendapatkan lagi ketika saya kehilangannya. Disamping itu betapa senang dan bahagianya saya jika Software yang saya postingkan ini bisa bermanfaat bagi orang banyak . Amin.... :)
oh ya Adobe Photoshop yang saya sediakan ini adalah Adobe Photoshop CS2. Ya walaupun sekarang adobe Photoshop sudah mencapai adobe pohoshop CS5, bahkan Adobe sendiri sudah mulai merancang versi CS6, tampaknya si CS2, masih banyak digandrungi. Mungkin karena Adobe Photoshop CS2 ini cukup ringan sehingga bisa dipakai di komputer Pentium 3 sekalipun. Nah .. bagi Anda yang ingin Download Software ini silahkan download langsung aja dibawah ini. Okey ...
Download Sekarang juga Software Adobe Photoshop CS2 + Keygen dengan meng-klik tombol dibawah ini.
installer Adobe Photoshop CS2
keygen Adobe Photoshop CS2
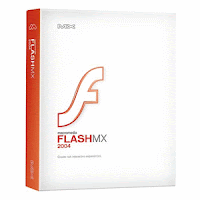
Macromedia Flash MX + Serial Number

Software Macromedia Flash MX 2004
Membuat Semua Link di Blogspot terbuka di window (tab) baru /Make All Links Open In A New Window
You can, similarly, do this with pictures. If you want your reader to view a picture, then return to the text in your article, you open the picture in a new window.
Instead of coding each individual link to a blog, picture, or web site, you can make all links within your blog open in a new window. Simply add a "<base target='_blank' />" to your blog, in the header.
Find
<head>
And change that to:
<head>
<base target='_blank' />
But, consider this carefully. If you construct your blog heavily using hypertext, as I construct my blogs, do you really want your readers having to close a window each time they finish reading a linked article in your blog? Do this with discretion.
While the reader is in your blog, give them one choice of what to read at any time. If they click on a link to read some detail, let them read the detail. Then, they click on the Back button, and return to where they left the previous article. Only if the reader is leaving your blog, to read another web site for detail, should you keep your blog open in the current window, and open a new window for the new web site.
Cara Membuat Twitter Follow Burung Terbang (bird Sprite) pada Blogspot
Hallo Sobat Edit-HTML, kali ini saya akan menjelaskan bagaimana cara membuat twitter Follow dengan gaya burung yang terbang ke seluruh halaman blog sobat, cukup mudah dan sangat praktis namun tetap kreatif, inilah langkah-langkahnya:
Blogger Dashboard > Layout > Page Element > Add a Gadget > HTML/JavaScript
Kemudian Copykan Code dibawah ini ke HTML/JavaScript yang telah terbuka
Keterangan
Yang berwarna merah dapat disesuaikan dengan alamat blog / akuntwitter sobat edit-HTML.
Kemudian Simpan dan Lihat Hasilnya
PORSENI AL-MASTHURIYAH 2011
sambutan dan pembukaan.
pengibaran bendera porseni dan menyanyikan mars Al-Masthuriyah
penampilan seni bela diri dan tari saman
beberapa atraksi santri putri
atraksi santri putra
santri putra Madrasah Ibtidaiyah
antusiasme penonton dan peserta
gunting pita dan kunjungan Bapa Direktur dan keluarga ke Arena Bazar Al-Masthuriyah.
Hari/tanggal : Minggu, 19 Juni 2011
Tempat : Lap. Utama dan Arena Bazar Al-Masthuriyah.
di ambil dari http://jamalenciel.webs.com/
Membuat Link Redirect pada Blog Blogspot dengan meta content
1. Login ke blogger seperti biasa
2. Pergilah ke tab "pengaturan" blog lama anda (yang sudah memiliki trafik yang lumayan banyak)
3. Selanjutnya kliklah "Edit HTML"
4. Carilah kode tag dan letakkan kode berikut di bawahnya
keterangan
3 menunjukkan waktu loading redirect ke blog baru anda dalam satuan detik (semakin kecil semakin cepat, misalnya:1 maka berarti 1 detik)
http://edit-html.blogspot.com gantikan dengan URL atau alamat blog/website baru yang ingin di redirect.
5. Klik Simpan Template
Cara membuat Iklan melayang di Blogspot
1. Login ke Blogger
2. kLik Tata Letak => Klik elemen Tambah Gadget
3. Pilih Gadget yang bertemakan HTML/Java Script
4. Isikan Kode berikut di dalamnya
<style type="text/css">
#gb{
position:fixed;
top:10px;
z-index:+1000;
}
* html #gb{position:relative;}
.gbcontent{
float:right;
border:2px solid #000000;
background:#F1DEDE;
padding:10px;
}
</style>
<script type="text/javascript">
function showHideGB(){
var gb = document.getElementById("gb");
var w = gb.offsetWidth;
gb.opened ? moveGB(0, 30-w) : moveGB(20-w, 0);
gb.opened = !gb.opened;
}
function moveGB(x0, xf){
var gb = document.getElementById("gb");
var dx = Math.abs(x0-xf) > 10 ? 5 : 1;
var dir = xf>x0 ? 1 : -1;
var x = x0 + dx * dir;
gb.style.top = x.toString() + "px";
if(x0!=xf){setTimeout("moveGB("+x+", "+xf+")", 10);}
}
</script>
<div id="gb">
<div class="gbtab" onclick="showHideGB()"> </div>
<div class="gbcontent">
<div style="text-align:right">
<a href="javascript:showHideGB()">
.:<img src="https://blogger.googleusercontent.com/img/b/R29vZ2xl/AVvXsEhuKb62feiwiikGsaeg5moICoj-ynPCKijl4ix8ISc2vzqGyo2bS3fvPr2RSdn2xa-XFn8e_-tqgFy6e8u-xpwGeJwkoSZYXu1JVwSeqdz4cG1ry89XOTnrnw9ZDc18oL8l0fy9VSmuCi2L/" title="kalau muncul, klik lagi" alt="tutup" />:.
</a>
</div>
<center>
SCRIPT IKLAN ANDA DI SINI - BISA DIISI DENGAN APA AJA SIH, TERSERAH~
</center>
<script type="text/javascript">
var gb = document.getElementById("gb");
gb.style.center = (30-gb.offsetWidth).toString() + "px";
</script></div></div>
5. Klik simpan.
Selesai namun jika anda ingin merubah warna atau garis tepi silahkan edit scripts diatas di bagian border
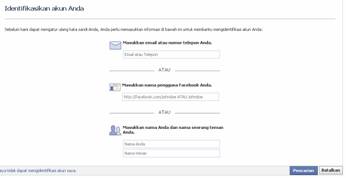
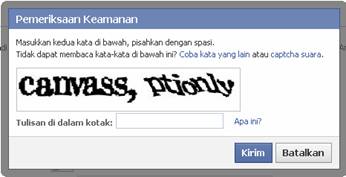
Mengembalikan Account Facebook Yang Dibajak Orang (Hacked!)
 |
 |
 |
 |
- Bedakan antara email yang anda gunakan untuk login dengan email yang anda sebarluaskan untuk teman/relasi anda
- Saat berkomunikasi dengan menggunakan media apapun jangan pernah menjawab, atau terpancing untuk menjawab pertanyaan seputar pertanyaan kunci bagi email anda.
- Bila anda login di tempat umum, jangan lupa untuk logout. Setelah logout bersihkan cookies dan cache memory dari browser yang anda gunakan.
"Idiot Proof Video Converter" Aplikasi MP4 Untuk Yang Suka Tampilan Sederhana (Free Download)
Konverter ini mendukung MP4, Matroska (MKV), AVI. cocok digunakan untuk mereka yang ingin mengkonversi video untuk disimpan dan ditampilkan pada peralatan genggam seperti iPod, MP4 Player, dan lain sebagainya.
Program ini dapat anda download secara GRATIS di: http://antmason.com/Article.aspx?A=f6c2c210-2b89-4972-98cc-296406ff9706
Note:
Untuk menjalankannya PC anda harus terinstal .NET Framework yang dapat anda download di: http://www.microsoft.com/downloads/details.aspx?FamilyId=333325FD-AE52-4E35-B531-508D977D32A6&displaylang=en
Mari Berkomunitas Di Faceblog
Pengen Iseng-iseng dapat Ilmu dan pengetahuan ?
Pengen Mengenal para Bogger-Blogger di Indonesia ?
Pengen Sharing Ilmu dan Pengetahuan ?
Pengen Berbagi pengalaman ?
Pengen tahu Pengembangan dunia Blog dan dunia internet di Indonesia?
Pengen Blog kita di kenal banyak orang?
Tidak ada salahnya kita mencoba
Lebih baik Mencoba daripada hanya diam
Tidak ada salahnya perbanyak teman
Banyak teman banyak rejeki
Tidak ada salahnya berbagi
Dengan Berbagi hidup akan lebih mudah
Tidak ada salahnya mencari ilmu
Ilmu adalah Hal yang termahal didunia
Okey Broooo……..
Ku tunggu kedatangannya di faceblog….. “ Mari Berkomunitas Di Faceblog “
Downloads cFosSpeed 6.60 build 1852 Final
You can use cFosSpeed with a router and/or a DSL-modem or cable-modem. You can also use cFosSpeed with other types of Internet access, ie. whenever you already have an existing Internet connection. cFosSpeed supports a wide variety of connections, like DSL, cable, ISDN, UMTS, etc.
cFosSpeed 6.60 build 1852 -- 11-May-2011
* Added support for Logitech G15 and G19 Gamer keyboards. When cFosSpeed
detects such a keyboard, it offers a the option to display the status
window on the display of the G15 or G19 display. If you enable it,
the skin windows will then be displayed on the keyboards display,
thereby offering all cFosSpeed Traffic Shaping information during
fullscreen mode apps / games. In addition, you can switch between
low latency / favour bandwidth wit the Button 1 on the G15 and the
UP Button on the G19.
Skins for Logitech G15 & G19 were donated by Ingo Günther.
* Added keyboard LED indicators. cFosSpeed can indicate certain
traffic shaping values by blinking the Num Lock and Scroll Lock
LEDs. See http://www.cfos.de/e...yboard-leds.htm
for more information.
+ When the traffic class is still not set (at the beginning of a connection)
the class column will display "working" or nothing. If more traffic is
coming, the class name will be shown or when no rule matches and no class
has yet been set for a connection the class is set to default.
+ If traffic shaping is (partly) inactive, this is now shown in "spd speed"
command.
+ Added -udp-vol rule: it counts the volume of an UDP pseudo-connection.
Volume in this sense are all bytes including the IP and UDP header.
Added -udp-cnt rule: it counts the number of UDP packets in an UDP
pseudo-connection.
+ Extended arguments for -tcp-seq and -tcp-cnt rules to 64 bit.
+ Added gset variable tx_shape, default 1, to en/disable tx-shaping globally.
x TCP SYNs were not properly prioritized. Fixed.
x Uploads do now slow down downloads less than before.
x Fixed behaviour of overlapping active areas in skins. Now the topmost one
catches the mouse click.
x For troubleshooting, you can now specify the Net Talk broadcast address.
Use "spd set net_talk_bcast x.x.x.x" to do that, address 0.0.0.0 means
use default, which is 255.255.255.255 or the subnet broadcast address like
192.168.0.255. Thanks to Drool for inspiration.
x Fixed serious bug in -l7-prot, -udp-prog, -tcp-prog and -prog filter rules
when they were used with negation (like -l7-prot !@user.ini/normalprots).
This caused program and protocol settings to malfunction if you had made
changes to them (changes are recorded in user.ini and filter rules contain
negations to read them properly). This bug was introduced in since
v5.13.1694. Thanks to km for his bug reports.
x The installer started the status window with elevation. Fixed.
x Fixed installation problems where cfosspeed.exe could not be overwritten.
x Fixed a potential problem when stopping a system service. Thanks to Richard
B. for testing.
x Skins would not display more than 21Mb/s speed. Fixed. Thanks to kamcm for
bug report.
x Fixed a long-standing problem where cFosSpeed might perform poorly after a
wakeup from standby. Notably, UDP connections would not time-out and ever
increase in numbers.
x Fixed a error where certain skins would be incorrectly loaded and thus not
displayed at all.
x Fixed a bug in -prog and -l7-prot filters: they did not properly accept
multiple arguments separated by commas. Thanks to Thomas Quella for his bug
report.
x Large ping values were always displayed as 999ms. Fixed.
x On some machines the status window was always topmost. Fixed.
x Fixed a spurious freeze. Thanks to Andrey Chernov for dump file.
x For Windows 7 the main icon is not hidden as long as at least one icon skin
is displayed. Otherwise Windows cannot remember the icon settings. If you
don't want to see the main icon, you can disable it in the context menu. For
older OSes the main icon is hidden as long as at least one icon skin is
displayed.
x Variance accommodation now works for satellite connections with their very
long ping times as well. Thanks to ipcopter.de for help and support.
x No pinger boot will be done if both rx_shape and tx_shape are 0.
x Better tracking if test-pings reached the destination. If so, pinger will
not be used for burst and pingstat line starts with a '+'.
- Tested cFosSpeed with "teaming". We used an Intel Gigabit ET Dual Port
Server Adapter and their most recent teaming software v16.2. Please note:
The route to the Internet must go through the virtual teaming adapter,
not through one of the individual teamed adapters.
- Important notifications, e.g. the calibration notification and the trial
period expiration messages are now indicated by a symbol in the status window
if the skin supports it. Otherwise, the usual browser popup is used.
If you click on the symbol the corresponding website is displayed.
- The options menu is now also available for non-admins.
- More trace output for an installation problem where the service can not be
deleted.
- By default max_trace_size is now 10 mbytes.
- Switched to new compiler.
- If for some reason test-pings reach their destination (i.e. they are not
returned with "TTL exceeded"), we inhibit further test-pings with that TTL.
OS : Win XP/2000/Vista/Win 7
Language : Multilingual
Membuat Label Dengan Thumbnail Hover
 Label yang selama ini sering kita jumpai bentuknya hanya berupa tulisan saja, itupun sudah ada dalam fasilitas menu di blogger. Bagaimana jika mengganti label dengan thumbnail atau gambar dari postingan? caranya sangat mudah, hanya manambahkan sedikit kode css dan javascript maka label dengan thumbnail akan menghiasi blog sobat. Kali ini saya coba berikan tutorial blog tentang label dengan thumbnail hover.
Penulisan label juga harus sesuai dengan yang ada di blog sobat, seperti besar kecilnya huruf juga sangat memperangaruhi. Untuk memulainya, ada baiknya sobat backup terlebih dahulu templatenya dengan masuk ke Rancangan –> Edit HTML –> Download Template Lengkap.
- Tambahkan kode css berikut diatas / sebelum kode ]]></b:skin> :
img.label_thumb {
float:left;
padding:3px;
background:#CCC;
border:1px solid #A4A4A4;
width:100px;
height:75px;
margin-right:10px;
margin-top:10px }
img.label_thumb:hover {opacity:0.8;
filter:alpha(opacity=80);
-moz-opacity:0.80;
-khtml-opacity:0.8 }
- Kemudian tambahkan kode script berikut dibawah / setelah kode ]]></b:skin> :
<script type='text/javascript'>
//<![CDATA[
function labelthumbs(json){document.write('<div>');for(var i=0;i<numposts;i++){var entry=json.feed.entry[i];var posttitle=entry.title.$t;var posturl;if(i==json.feed.entry.length)break;for(var k=0;k<entry.link.length;k++){if(entry.link[k].rel=='replies'&&entry.link[k].type=='text/html'){var commenttext=entry.link[k].title;var commenturl=entry.link[k].href;}
if(entry.link[k].rel=='alternate'){posturl=entry.link[k].href;break;}}
var thumburl;try{thumburl=entry.media$thumbnail.url;}catch(error)
{s=entry.content.$t;a=s.indexOf("<img");b=s.indexOf("src=\"",a);c=s.indexOf("\"",b+5);d=s.substr(b+5,c-b-5);if((a!=-1)&&(b!=-1)&&(c!=-1)&&(d!="")){thumburl=d;}
else thumburl='';}
document.write('<a href="'+posturl+'" title="'+posttitle+'"><img class="label_thumb" src="'+thumburl+'"/></a>');
if(i!=(numposts-1))
document.write('');}
document.write('</div>');}
//]]>
</script> - Simpan Template.
- Masuk ke Elemen Laman –> Tata Letak
- Pilih salah satu gadget yang ingin sobat masukkan label, kemudian klik Tambah Gadget dan pilih yang HTML/Javascript.
- Kemudian masukkan kode berikut kedalamnya :
<script type='text/javascript'>var numposts = 6;</script>
<script type="text/javascript" src="/feeds/posts/default/-/Magazine?orderby=updated&alt=json-in-script&callback=labelthumbs"></script>
Keterangan :
- Tulisan yang berwarna hijau adalah lebar dan tinggi thumbnail, sobat bisa sesuaikan dengan lebar widget template sobat.
- Tulisan yang berwarna biru untuk jumlah label yang akan di tampilkan.
- Dan tulisan yang berwarna merah untuk label yang akan sobat tampilkan, jangan sampai salah menulis labelnya, besar kecilnya huruf juga sangat mempengaruhi.
Sekian saja tips dari saya, semoga bermanfaat.
Membuat Navbar Sendiri / Penutup Navbar
Nah Sekarang aku mau posting tentang cara membuat navbar yang berbeda... seperti contoh gambar dibawah ini... navbar merah yang dilingkarin hitam...
hehehe... sebenere itu bukan navbar ce tp itu cuman buat nutupin navbar biar tampilan blok kita lebih bervareasi... :)... ya udah kita langsung aja bagaimana membuatnya... okey... :)
1. Masuklah ke halaman Dasbor blog anda lalu klik Rancangan.
2. Kemudian klik pada Edit HTML.
3. Untuk berjaga-jaga jika terjadi kesalahan sebaiknya backup dulu template anda dengan mengklik Download Template Lengkap.
4. Kemudian centanglah Expand Template Widget.
5. Kemudian carilah kode ]]></b:skin> untuk mempermudah tekan tombol ctrl + F.
6. selah anda menemukan kode tersebut, letak Kode Dibawah ini tepat diatasnya..
#mta_bar{background:#444 url('http://s1180.photobucket.com/albums/x406/sismawan/Nav.jpg')
repeat-x; border-bottom:1px solid #111; z-index:100; top:0; left:0; width:100%; overflow:auto; position:fixed; margin-left:0; margin-right:0; margin-top:0; margin-bottom:4px; padding-left:0; padding-right:0; padding-top:8px; padding-bottom:6px}
* html #mta_bar{position:absolute; /*IE6 hack*/width:expression(document.compatMode=="CSS1Compat"? document.documentElement.clientWidth+"px":body.clientWidth+"px")}
#mta_bar .center{float:left; text-align:center; font-family:Verdana,Arial; font-size:13px; font-weight:bold; font-style:normal; color:#FFFFFF; width:65%}
#mta_bar .left{float:left; text-align:left; font-family:Verdana,Arial; font-size:13px; font-weight:normal; font-style:normal; color:#FFFFFF; width:20%}
#mta_bar .right{font-family:verdana,Arial,Helvetica,sans-serif; float:right; text-align:center; font-weight:normal; font-size:10px; letter-spacing:0; width:30px; white-space:nowrap}
#mta_bar .right a{font-size:10px; color:#FFFFFF; text-decoration:underline}
#mta_bar .right a:hover{font-size:10px; color:#80FF00; text-decoration:none}
#left_bar a{background:url('http://i1105.photobucket.com/albums/h356/Ozyw42/check-c.png') no-repeat; text-decoration:none; color:#FFFFFF; padding-left:23px; padding-right:0; padding-top:0; padding-bottom:0}
#left_bar a:hover{text-decoration:underline; color:#80FF00}
#left_bar2 a{background: url(http://i1180.photobucket.com/albums/x406/sismawan/facebook.png)
<script>
<!--http://infokanca.blogspot.com/-->
document.write(unescape('%6E%6F%2D%72%65%70%65%61%74%20%32%70%78%3B%20%74%65%78%74%2D%64%65%63%6F%72%61%74%69%6F%6E%3A%6E%6F%6E%65%3B%20%63%6F%6C%6F%72%3A%23%46%46%46%46%46%46%3B%20%70%61%64%64%69%6E%67%2D%6C%65%66%74%3A%32%31%70%78%3B%20%70%61%64%64%69%6E%67%2D%72%69%67%68%74%3A%30%3B%20%70%61%64%64%69%6E%67%2D%74%6F%70%3A%30%3B%20%70%61%64%64%69%6E%67%2D%62%6F%74%74%6F%6D%3A%30%7D%0A%23%6C%65%66%74%5F%62%61%72%32%20%61%3A%68%6F%76%65%72%7B%74%65%78%74%2D%64%65%63%6F%72%61%74%69%6F%6E%3A%75%6E%64%65%72%6C%69%6E%65%3B%20%63%6F%6C%6F%72%3A%23%38%30%46%46%30%30%7D%0A%23%6C%65%66%74%5F%62%61%72%33%20%61%7B%62%61%63%6B%72%6F%75%6E%64%3A%74%72%61%6E%73%70%61%72%65%6E%74%29%20%6E%6F%2D%72%65%70%65%61%74%3B%20%74%65%78%74%2D%64%65%63%6F%72%61%74%69%6F%6E%3A%6E%6F%6E%65%3B%20%63%6F%6C%6F%72%3A%23%46%46%46%46%46%46%3B%20%70%61%64%64%69%6E%67%2D%72%69%67%68%74%3A%32%33%70%78%3B%20%70%61%64%64%69%6E%67%2D%6C%65%66%74%3A%30%3B%20%70%61%64%64%69%6E%67%2D%74%6F%70%3A%30%3B%20%70%61%64%64%69%6E%67%2D%62%6F%74%74%6F%6D%3A%30%7D%7D%0A%23%6C%65%66%74%5F%62%61%72%33%20%61%3A%68%6F%76%65%72%7B%74%65%78%74%2D%64%65%63%6F%72%61%74%69%6F%6E%3A%75%6E%64%65%72%6C%69%6E%65%3B%20%63%6F%6C%6F%72%3A%23%38%30%46%46%30%30%7D%0A%23%74%6F%5F%74%6F%70%7B%62%61%63%6B%67%72%6F%75%6E%64%3A%74%72%61%6E%73%70%61%72%65%6E%74%20%75%72%6C%28%68%74%74%70%3A%2F%2F%69%31%31%30%35%2E%70%68%6F%74%6F%62%75%63%6B%65%74%2E%63%6F%6D%2F%61%6C%62%75%6D%73%2F%68%33%35%36%2F%4F%7A%79%77%34%32%2F%64%65%6C%65%74%65%2E%70%6E%67%29%20%6E%6F%2D%72%65%70%65%61%74%20%73%63%72%6F%6C%6C%20%30%25%3B%20%70%6F%73%69%74%69%6F%6E%3A%61%62%73%6F%6C%75%74%65%3B%20%2F%2A%74%68%69%73%20%72%65%70%6C%61%63%65%73%20%66%6C%6F%61%74%20%2D%20%66%69%78%65%73%20%74%68%61%6E%6B%73%20%74%6F%20%4C%61%72%72%79%20%6F%66%68%74%74%70%3A%2F%2F%62%6C%6F%67%2E%6C%72%6F%6F%74%2E%63%6F%6D%2A%2F%68%65%69%67%68%74%3A%31%38%70%78%3B%20%77%69%64%74%68%3A%31%39%70%78%3B%20%6D%61%72%67%69%6E%3A%30%20%30%20%30%20%39%30%30%70%78%3B%20%2F%2A%74%68%69%73%20%77%61%73%20%75%70%64%61%74%65%64%2A%2F%70%61%64%64%69%6E%67%3A%39%70%78%20%35%70%78%7D%0A%23%74%6F%5F%74%6F%70%20%61%7B%70%61%64%64%69%6E%67%3A%38%70%78%7D'));
<!-- visit http://infokanca.blogspot.com/ -->
</script>
7. Untuk url berwarna biru bisa anda ganti sesuka anda dengan url gambar anda sendiri. Setelah itu Cari Kode </head>, Setelah anda meemukannya letakkan kode dibawah ini tepat diatasnya..
<!--http://infokanca.blogspot.com/-->
document.write(unescape('%3C%73%63%72%69%70%74%20%73%72%63%3D%27%68%74%74%70%3A%2F%2F%73%69%74%65%73%2E%67%6F%6F%67%6C%65%2E%63%6F%6D%2F%73%69%74%65%2F%61%73%72%69%7A%61%6C%6F%66%66%69%63%69%61%6C%77%65%62%2F%6A%61%76%61%73%63%72%69%70%74%2F%53%74%72%69%70%74%2D%61%64%2E%6A%73%27%20%74%79%70%65%3D%27%74%65%78%74%2F%6A%61%76%61%73%63%72%69%70%74%27%2F%3E'));
<!-- visit http://infokanca.blogspot.com/ -->
</script>
8. Setelah itu cari kode <body>, terus letakkan kode dibawah ini tepat dibawahnya..
<!--http://infokanca.blogspot.com/-->
document.write(unescape('%3C%64%69%76%20%69%64%3D%27%6D%74%61%5F%62%61%72%27%3E%0A%3C%64%69%76%20%69%64%3D%27%6C%65%66%74%5F%62%61%72%33%27%3E%0A%3C%73%70%61%6E%20%63%6C%61%73%73%3D%27%63%65%6E%74%65%72%27%2F%3E%3C%2F%64%69%76%3E%0A%3C%64%69%76%20%69%64%3D%27%6C%65%66%74%5F%62%61%72%32%27%3E%0A%3C%73%70%61%6E%20%63%6C%61%73%73%3D%27%6C%65%66%74%27%3E%0A'));
<!-- visit http://infokanca.blogspot.com/ -->
</script>
<a href='URL FACEBOOK ANDA/FACEBOOK GROUP'>NAMA FACEBOOK ANDA/FACEBOOK GROUP</a>
<script>
<!--http://infokanca.blogspot.com/-->
document.write(unescape('%3C%2F%73%70%61%6E%3E%3C%2F%64%69%76%3E%0A%3C%64%69%76%20%69%64%3D%27%6C%65%66%74%5F%62%61%72%27%3E%0A%3C%73%70%61%6E%20%63%6C%61%73%73%3D%27%63%65%6E%74%65%72%27%3E%0A'));
<!-- visit http://infokanca.blogspot.com/ -->
</script>
<a href='URL BLOG ANDA/'>NAMA BLOG ANDA</a>
<script>
<!--http://infokanca.blogspot.com/-->
document.write(unescape('%3C%2F%73%70%61%6E%3E%3C%2F%64%69%76%3E'));
<!-- visit http://infokanca.blogspot.com/ -->
</script>
<script>
<!--http://infokanca.blogspot.com/-->
document.write(unescape('%0A%3C%73%70%61%6E%20%63%6C%61%73%73%3D%27%72%69%67%68%74%27%20%6F%6E%6D%6F%75%73%65%6F%75%74%3D%27%73%65%6C%66%2E%73%74%61%74%75%73%3D%26%61%70%6F%73%3B%26%61%70%6F%73%3B%27%20%6F%6E%6D%6F%75%73%65%6F%76%65%72%3D%27%73%65%6C%66%2E%73%74%61%74%75%73%3D%26%61%70%6F%73%3B%61%73%72%69%7A%61%6C%77%61%68%64%61%6E%77%69%6C%73%61%26%61%70%6F%73%3B%3B%72%65%74%75%72%6E%20%74%72%75%65%3B%27%3E%20%3C%69%6D%67%20%61%6C%69%67%6E%3D%27%61%62%73%6D%69%64%64%6C%65%27%20%62%6F%72%64%65%72%3D%27%30%27%20%6F%6E%43%6C%69%63%6B%3D%27%63%6C%6F%73%65%54%6F%70%41%64%73%28%29%3B%72%65%74%75%72%6E%20%66%61%6C%73%65%3B%27%20%73%72%63%3D%27%68%74%74%70%3A%2F%2F%69%31%31%30%35%2E%70%68%6F%74%6F%62%75%63%6B%65%74%2E%63%6F%6D%2F%61%6C%62%75%6D%73%2F%68%33%35%36%2F%4F%7A%79%77%34%32%2F%64%65%6C%65%74%65%2E%70%6E%67%27%20%73%74%79%6C%65%3D%27%63%75%72%73%6F%72%3A%68%61%6E%64%3B%63%75%72%73%6F%72%3A%70%6F%69%6E%74%65%72%3B%27%2F%3E%3C%2F%73%70%61%6E%3E%3C%2F%64%69%76%3E'));
<!-- visit http://infokanca.blogspot.com/ -->
</script>
9. Untuk yang berwarna merah danbiru bisa anda isi/ganti dengan url blog dan nama blog anda,
Contoh :
<a href='http://www.facebook.com/home.php?sk=group_151944778194641'>Back Packer Grup</a>
<a href='http://infokanca.blogspot.com/'>infokanca.blogspot.com</a>
10. simpan template dan lihat hasilnya..
Selamat Mencoba ..... :-)


